How to Fit an E Collar on a Dog: A Simple & Effective Guide
Training your furry friend? Fitting an E collar on a dog can sometimes feel like solving a puzzle with your furry friend. Most common scenario is: you fumble with the straps and buckles, and your four-legged companion looks up at you with a mix of confusion and mild annoyance. How tight is too tight? Is it comfortable for your dog? These questions create a mix of anticipation and slight frustration.
In this guide, “How to Fit an E Collar on a Dog” we explain in detail how to use it correctly. We’ll look into the concept, use, and purpose of e-collars, emphasizing the importance of proper fitting for the comfort of your dog. We also discuss the effectiveness of training with E collar, unravel the mystery of e-collars, helping you to become a pro in no time! So, are you ready to step up your dog training game?

Understanding the E-Collar
Let’s talk about e-collars. An e-collar, or electronic collar, is a handy tool we use in dog training. It sends a signal, like a tiny shock, buzz, or beep, to help our dogs learn what behaviors we like and what we don’t. We use it to guide our dogs, not to punish them. It’s a great way to help our dogs understand what we want from them.
There are different types of e-collars to pick from. Here are the main ones:
- Static Shock Collars: These give a small zap to your dog’s neck. You can change how strong the zap is based on your dog’s size and how tough they are.
- Vibration Collars: These collars buzz instead of zapping. They’re great for dogs who can’t hear or who don’t like the zap.
- Spray Collars: These collars squirt a safe but stinky spray at your dog’s nose to help them stop doing something you don’t like.
- Ultrasonic Collars: These collars make a high sound that only dogs can hear. It helps get their attention.
Each type of e-collar has its own job. For example, we often use static shock collars to teach dogs to stay in the yard. Vibration collars can be good for dogs who can’t hear or don’t like the zap. Spray collars work well to help dogs stop barking too much, and ultrasonic collars can also be used for this or for other training.
We usually use an e-collar when other training hasn’t worked or when the dog is doing something dangerous. If your dog keeps running away and won’t listen when you call them, an e-collar might help. But remember, e-collars are just one tool in our training toolbox. We should also use lots of praise and rewards to help our dogs learn.
How to Fit An E Collar On a Dog?
Ensuring the proper fit of an e-collar on your dog is crucial for both the effectiveness of training and the comfort of your pet. Here, we’ll guide you through the process step-by-step, provide visual aids, and offer some handy tips to make the process easier.
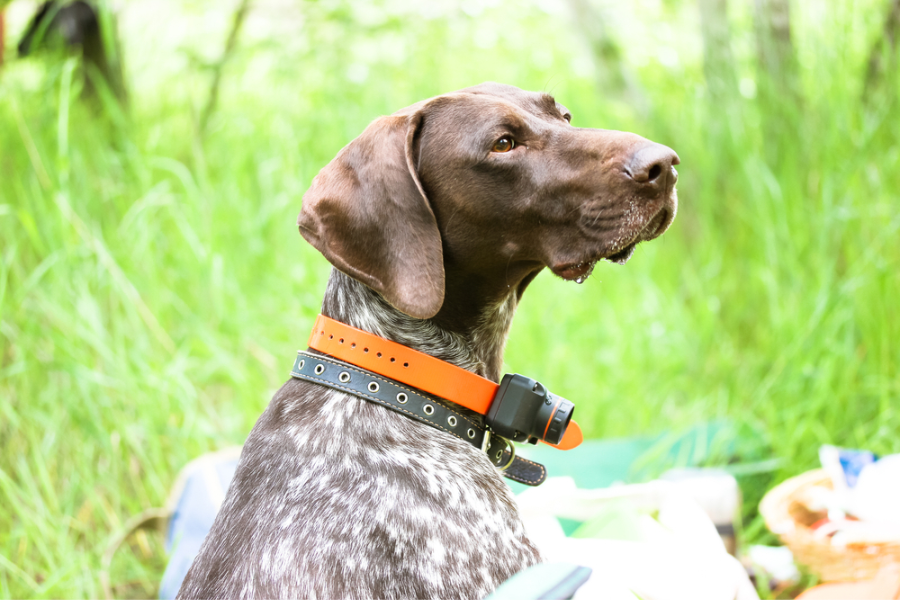
Step-by-step Guide on Fitting an E-collar
1. Begin by ensuring your dog is calm and comfortable. Then we can introduce E-collar to your dog, allow your dog to sniff and inspect the E-collar.
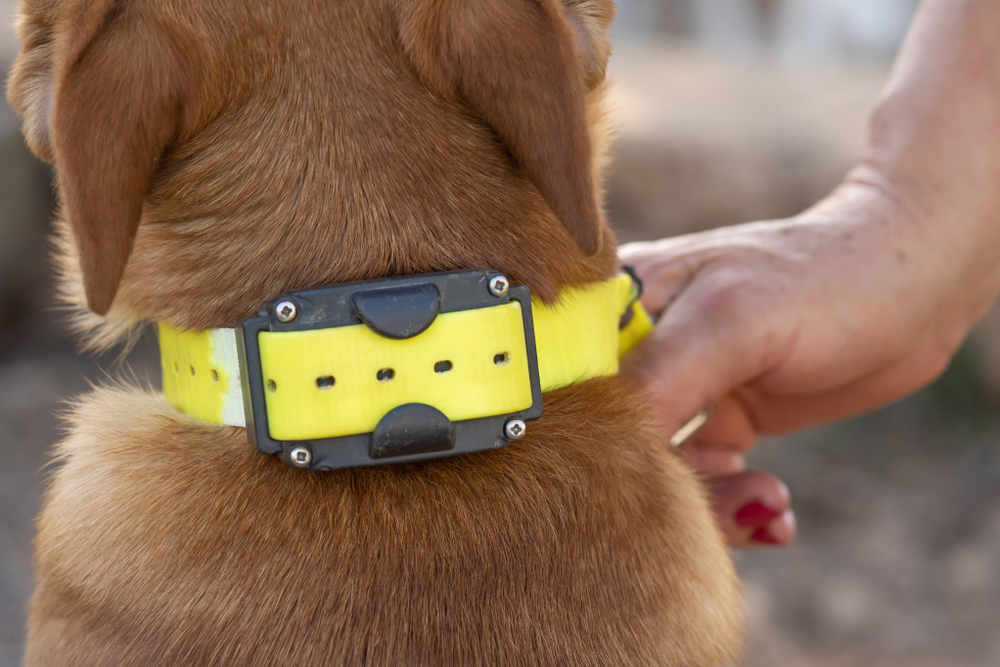
2. Position the e-collar high on your dog’s neck, close to the head. The receiver should be underneath the neck, touching the skin. Avoid placing it on the throat area.
3. Check the position, it should be high up, close to the ears and above the regular collar. A good rule of thumb is to fit one or two fingers between the collar and your dog’s neck.
4. Start with no shock activation, let your dog wear the collar without turning it on for short periods initially.
5. Gradually increase the duration your dog wears the collar over several days.
4. Check that the contact points are touching the skin. If they’re not, the e-collar may not work effectively.
Tips for Making the Process Easier
Always ensure your dog is relaxed before fitting the e-collar. Use positive reinforcement, like treats or praise, to create a positive association with the e-collar. Regularly check the fit of the collar, as it may loosen over time, and adjust as needed.
Suggested Collar Sizes For Different Dog Breeds
| Breed | Average Neck Size (Inches) |
| Chihuahua | 8-14 |
| Yorkshire Terrier | 6-12 |
| Pomeranian | 10-14 |
| Beagle | 12-18 |
| Border Collie | 14-18 |
| Golden Retriever | 16-24 |
| German Shepherd | 18-24 |
Common Reactions When An E-Collar Is Not Fitted Properly
Ensuring that an E-collar is properly fitted is crucial for the safety, comfort, and effectiveness of the training process.
- Skin Irritation or Injury: Due to the increased pressure or rubbing on the skin, a too tight collar may result in skin irritation, redness, or even damage. This may be especially troublesome if the collar is worn continuously for long periods of time.
- Behavioral Issues: An poorly fitting E-collar may cause discomfort, which might result in behavioral problems. The dog’s response to the pain or discomfort might be to become less active or aggressive.
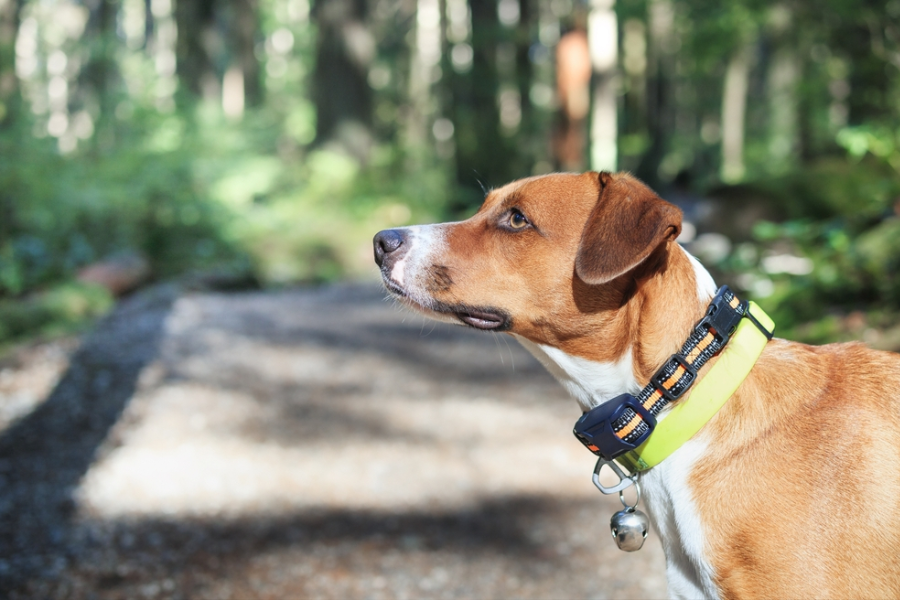
- Ineffectiveness in Training: An too loose E-collar may not consistently make touch with the dog’s skin, which would make it useless for training. The stimulus may not have the desired impact on the dog, which might cause confusion and poor training results.
- Loss of Trust: If the E-collar causes discomfort or pain due to improper fitting, it can lead to a loss of trust between the dog and the owner. This can negatively impact not only training but also the overall relationship.
Impact of a Tight Fit on a Dog
A poorly fitted e-collar can cause discomfort and even injuries to your dog. It may rub, causing skin irritation, or it could restrict your dog’s breathing if it’s too tight. An overly loose collar, on the other hand, may not work effectively for training.
Along with serious skin damage, another worrisome condition is pressure necrosis, in which the skin and organs underneath can die because the collar is putting too much pressure on them and cutting off blood flow.
Beyond physical harm, the behavioral implications of a tight E-collar are notable. In some cases, this discomfort can even lead to aggressive behavior, which is a significant concern for both the dog and its handlers.
Moreover, tight collars can lead to breathing difficulties and eating issues, particularly in breeds prone to respiratory problems. The general discomfort caused by a tight E-collar can significantly diminish a dog’s quality of life, leading to restlessness and a lack of sleep.
As a responsible pet owner or trainer, regular checks and adjustments of the E-collar’s fit are essential. When in doubt, seeking guidance from a veterinarian or a professional trainer is always a wise decision.
Where to Put the E-Collar
The e-collar goes on your dog’s neck, right below their ears. It should touch their skin but not choke them. You should be able to slip a finger or two under the collar. If it’s too loose, it won’t work. If it’s too tight, it can hurt your dog. So, find the sweet spot where it’s just right.
Putting the e-collar in the right spot is super important. If it’s in the wrong place, it won’t work, or it could even hurt your dog. So, take your time and get it right.

Troubleshooting Common E-Collar Problems
As we delve deeper into the world of e-collar fitting, we discover that it’s not always a walk in the park. There are common issues that dog owners often encounter.
However, don’t fret! We’re here to guide you through these problems and offer practical solutions to ensure your e-collar fitting experience is as smooth as possible.
Common issues with e-collar fitting
When fitting an E-collar on your dog, several common issues can impact its effectiveness and the overall training experience.
Firstly, if the collar is not functioning, Additionally, the contact points need to be kept clean and in good condition for proper functionality.
Another frequent issue is inconsistent stimulation, often due to improper fitting. The collar should be snug but not too tight, allowing two fingers to fit comfortably between the collar and your dog’s neck. This is particularly important for long-haired dogs, where ensuring that the contact points are touching the skin might require trimming the fur or using longer contact points.
Lastly, a significant concern is the over-dependence on the E-collar for training. It’s important to adopt a balanced training approach, using the E-collar as just one of several training tools. Relying solely on the E-collar can lead to over-dependence and might not effectively address underlying behavioral issues.
How to resolve these issues
1. Collar Not Functioning
- Check Battery: Ensure the collar’s battery is charged or replaced if necessary.
- Inspect for Damage: Look for any signs of damage to the collar or its components.
- Test the Contact Points: Make sure the contact points are clean and functioning properly.
2. Inconsistent Stimulation
- Proper Fit: Adjust the fit so that the collar is snug but not too tight, allowing two fingers to fit between the collar and your dog’s neck.
- Contact with Skin: Especially in long-haired dogs, ensure the contact points are touching the skin. Trim the fur around the neck or use longer contact points if necessary.
3. Over-Dependence on the Collar
- Balanced Training Approach: Use the E-collar as one of several training tools. Relying solely on the collar can lead to over-dependence.
- Vary Training Methods: Mix in other forms of positive reinforcement and training techniques.

When to seek professional help
Despite our best efforts, there might be instances when professional help is necessary. If your dog continues to show signs of discomfort or fear even after adjusting the e-collar, it’s time to consult a professional dog trainer or a vet.
If your dog develops skin issues or wounds due to the collar, seek immediate veterinary care. Remember, your dog’s health and comfort should always be your top priority.
Training Your Dog with E-Collars
To train your dog with an E-collar, you need to follow a set plan, starting with basic commands and working your way up to more difficult ones. Here’s a thorough, step-by-step plan with ideas for what to do at each stage:
Basic Training Principles
- Start with Basic Commands
Begin with simple commands like ‘sit’, ‘stay’, ‘come’, or ‘heel’ that your dog already knows.
Activity: Practice these commands in a familiar environment. Use the E-collar stimulation as a gentle nudge when giving the command.
- Use the Lowest Stimulation Level
Set the E-collar to the lowest level that your dog notices. It should be a subtle signal, not uncomfortable or frightening.
Activity: Observe your dog’s reaction to the stimulation. Look for a small reaction, like a head turn or ear flick, which indicates they notice it.
- Timing is Crucial
Apply stimulation exactly when the undesired behavior occurs, so your dog understands what is being corrected.
Activity: If your dog pulls on the leash, apply the stimulation at the exact moment they pull, and release it when they stop.
- Consistency
Be consistent with commands, tone of voice, and the timing of stimulation. Inconsistent cues can confuse your dog.
Activity: Repeat training sessions at the same time each day and use the same words and intonation for each command.
Advanced Training
- Gradually Increase Complexity
As your dog gets comfortable with the collar, introduce more complex commands or tricks. Teach commands like ‘roll over’ or ‘play dead’, using the E-collar to guide through each new behavior.
- Controlled Environment
Start training in a place with minimal distractions to help your dog focus. Begin in a quiet room or a fenced yard before gradually moving to parks or areas with more stimuli.
Practical Tips for Each Step
- Positive Reinforcement: Always combine E-collar training with positive reinforcement. Reward your dog with treats, praise, or playtime for obeying a command.
- Short Training Sessions: Keep training sessions short and sweet, especially in the beginning, to avoid overwhelming your dog.
- Monitor Your Dog’s Reaction: Pay close attention to how your dog responds to the training. Any signs of stress or fear may indicate the need to adjust your approach.
- Patience is Key: Training takes time. Be patient and give your dog time to understand and respond to this new form of communication.
Helping Your Dog Behave with E-Collars
E-collars can stop your dog from doing things you don’t like, like barking a lot or running after cars. They work by giving a small buzz that gets your dog’s attention. But remember, e-collars aren’t a magic fix. They’re just one part of teaching your dog how to behave.
Easy Tips for Using the E-Collar
Start with the lowest buzz on the e-collar. You just want to get your dog’s attention, not scare them. If you need to, you can turn it up a little. But always watch your dog to make sure they’re okay.
And don’t forget to give your dog treats or a pat on the head when they do something right. This helps them know they’re doing a good job!
Conclusion
Let’s wrap this up. We’ve shown you the ropes of e-collar fitting. We talked about what an e-collar is, the different kinds, and when to use them. We stressed why it’s key to put the e-collar on right and gave you a step-by-step guide.
We shared tricks to dodge common slip-ups and how to fix issues that pop up. We shined a light on how e-collars help train your dog, and gave you tips to use them the right way.
Keep in mind, your dog’s comfort and health come first. So, getting the e-collar fit right is a big deal. We hope our guide makes training your dog with e-collars a breeze. Remember, stay patient, keep at it, and always be kind to your four-legged buddy.


